Thanks everyone, and yes it was a lot of effort. But I have a tendency to put more work into things than they really need. Sorry if this post is a little long...
NSFW,
The pins come in a lot of different sizes, so choose ones that you think will work for your design. These are the exact ones I used:
https://www.ebay.com/itm/100x-P100-B1-1 ... rk:13:pf:0
I personally think you could 3-D Print a fixture that would work.
I found implementing the BDM NT device to be much harder than I was expecting. I spent more time figuring out how I would do this and how to actually get it to work then it too me to make the fixture. I've spent the last 40+ years as a precision machinist, welder and fabricator. So typically when I need to play with electrons, or manipulate a line of software code or a system config file, I really am out of my element. I think the only reason I eventually stumble through projects like this is my ability to pay attention to details. Something that you learn how to do really well as a machinist.
I chose to make the fixture universal because I do not know where this "Playing with EFI" is going to take me. I may use it to program other engine computers in the future. Probably the simplest way to use the USB BDM NT device is to wire the ribbon cable directly to the PCM like PeteS did. MUCH simpler for sure.
For my project, I didn't want to do it this way. Instead, I made the part that holds the test probe pins separate, and it just bolts to the cross-bar of the programming fixture:
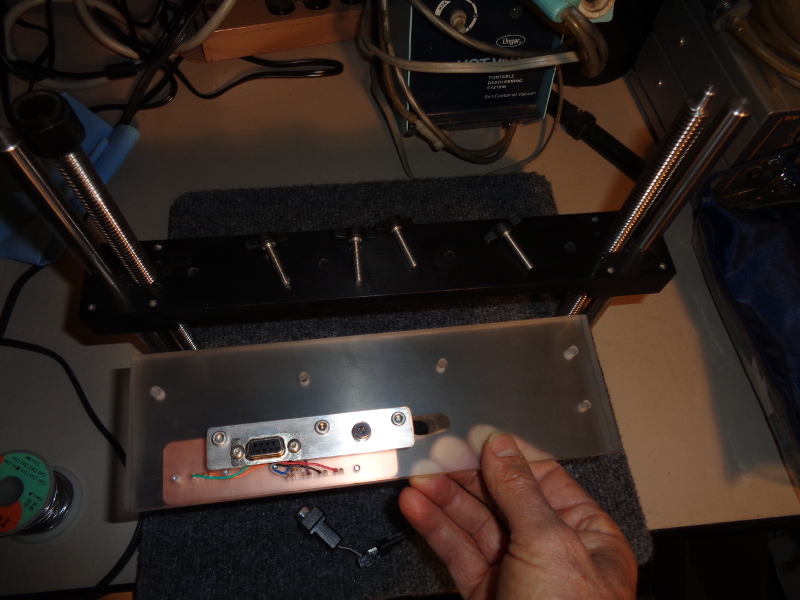
- bdm8.jpg (299.54 KiB) Viewed 10505 times
Before I started this project, it would have been very helpful to me if I knew these three things that are not included in the existing BDM NT documentation:
First, I learned (the slow and hard way) that it's super critical to keep the lead length from the BDM NT device as short as possible. Otherwise, you will be reading and writing junk.
Second, the USB BDM NT device does have three configurable speeds. <Speed>0</Speed> sets the device to 6mhz, <Speed>1</Speed> sets the device to 3mhz, and <Speed>2</Speed> sets the device to 1.5mhz. These can be set in the .xml config file for the target you are reading and writing to.
Third, I also learned that the programming pin WPP that the USB BDM NT documentation talks about is actually the Vpp pin on the Intel Flash AB28F400B5 memory chip. This pin needs to be pulled up to something higher than 11.4 volts for an erase or write to work correctly. But what the existing BDM NT instructions don't tell you is it actually has a maximum voltage you shouldn't exceed. I discovered this in the datasheet for the Intel flash memory chip. The data sheet specifies that Vpp needs to be somewhere between 11.4 volts dc and 12.6 volts to correctly work. This higher pin voltage (between 11.4-12.6) is only needed when doing an erase or write to the flash memory. The existing BDM NT documentation states to put something like a 100 ohm resistor in series to the pin, but I found this not helpful in my case. So I implemented a variable resistor (potentiometer) in my programming cable.
I built my programming cable to have these features. On one end is the voltage input to the cable (I use a 13 volt supply). It has a safety fuse (1 amp) and a voltage meter so I know what the cable is being feed. This input voltage is controlled through a switch that sends it to pins 19 (ignition) and 20 (battery) on the blue connector. I also feed ground to pin 60 on the blue connector.
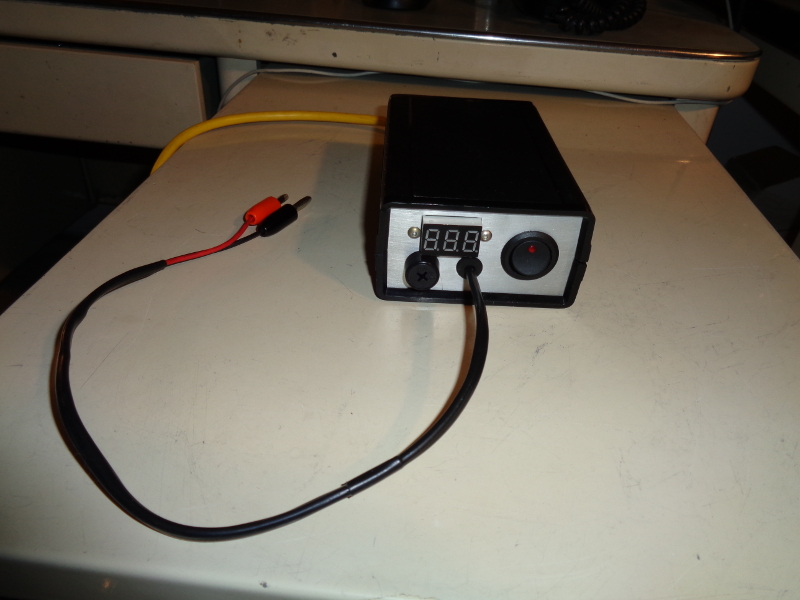
- bdm10.jpg (288.55 KiB) Viewed 10505 times
The other end of the cable has the blue connector cable output, another switch for sending 12 volts to the Vpp pin for erasing and writing. It also has a voltage meter so I know exactly what voltage the Vpp is getting.

- bdm11.jpg (290.67 KiB) Viewed 10505 times
I mention earlier that I put a trim pot inside the programming cable I made so that I could adjust the voltage at pin Vpp to 12 volts. I use a .75 watt, 15 turn pot for this. It's located on the side of the black programming cable case. Access is with a very small screwdriver.

- bdm12.jpg (338.13 KiB) Viewed 10505 times
Anywho, sorry again for the long length of this post. I hope this information helps others who try to do this.
David